
I have been wanting to play around with creating something from a few broken beads that I had in my crafting bin. I decided to break more of them recently to make a rock-candy inspired ring. Growing up I was not able to eat rock candy, since it was pure sugar, but my family used it from time to time. I was basically a sugarless hyper-energetic child, but in a good way! However, food in general to me is much like art—even now I can see the art in various forms of rock candy.
If you've never had this classic confection it's made from crystalled sugar and may come in a diverse range of colours by the simple addition of food colouring during the creation process.
Rock candy, (not to be confused with sticks of Rock/Blackpool Rock) has been widely used and enjoyed for centuries. It is also referred to as candy sugar, better known from its origin of India and Iran since the ninth century. In some cultures it is used in teas, for medicinal purposes, and even as a sweetener in certain cuisine.
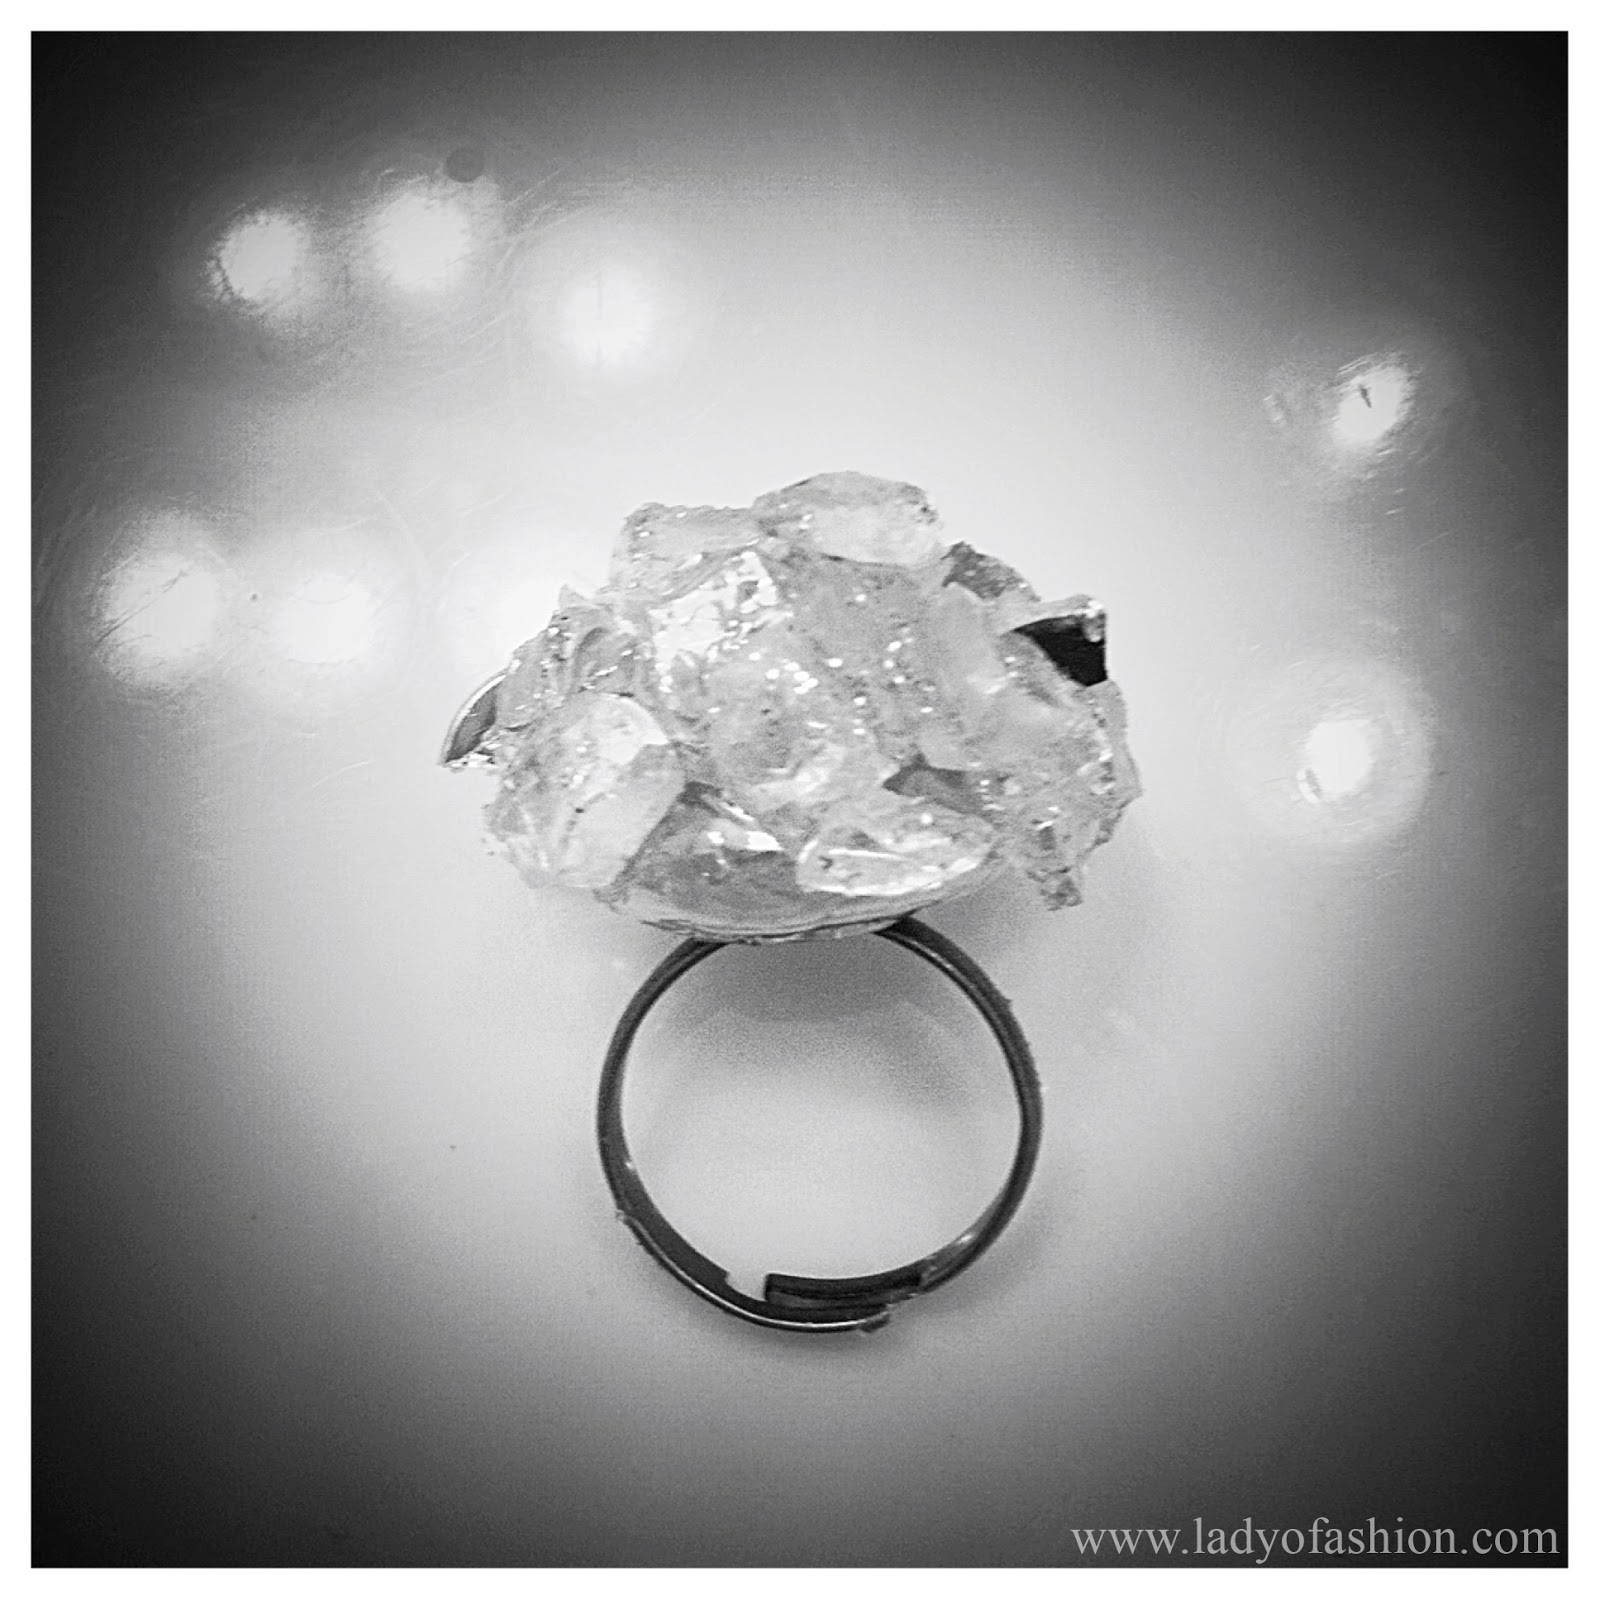
Have you had rock candy before? Now that you know a bit more about rock candy, view my version of it below worn as a playful and uniquely styled ring. I am so excited to wear it and already making a few other colours for friends!
Materials:
Glass Marble (1) per ring
Acrylic Beads approx. 10 pcs.+/-
Heavy Duty Glue
Adjustable ring (1)
Glitter Glue or Dried Glitter
Hammer
Scissors to cut excess (optional)
Cloth/Flannel


To begin, take a handful of acrylic beads and place them in a cloth (a face cloth size works fine), then hammer away at it until breaking the beads in smaller pieces. After the preferred size is achieved start to glue the beads to the top of the glass marble one by one.
If you use the clear acrylic beads like mine, they have a mirror-like film on the backside of each bead. As you hammer the beads be mindful of this so that you may have some of the beads scratched more than others on their backside. To do this, turn some of the beads on opposite sides as you hammer away. The rubbing against each other with the cloth creates this effect.

To give my ring that extra sparkle and more depth I used the backside of the beads as I glued them, creating somewhat of an asymmetrical raised shape. By using my technique when the light hits the ring, it now has a sparkling effect with the mirrored edges dispersed throughout the ring.
Afterward, I added dried glitter-glue atop the now formed rock. You may also use loose glitter to carefully drizzle small parts of the rock. Let dry. Lastly, attach the rock to the adjustable ring. Let dry, and wear!


*Further reading and fun facts on candied rock here.
*Don't forget to follow via Bloglovin' and Facebook to stay updated.

.jpg)


great idea, i love it, its a beautiful ring!!!
ReplyDeleterock4less.blogspot.co.uk
Wow, this is extremely beautiful!!!! love it so much!
ReplyDeleteStyle Without Limits
Facebook
Seriously Madison, you have been so good! Great job, really love the result, too precious!:) Kisses dear! xo
ReplyDeletehttp://lilliness.blogspot.it/
I am in love with this DIY! I couldn't wait to see the final product when you posted it on IG. This is such a brilliant idea. I might try it!
ReplyDeleteThat ring is pure awesomeness! And I do have rock candy at home coz I bought it for this chinese dish recipe I wanted to make (but haven't yet):)
ReplyDeleteThanks! I am very proud of this one and so glad that it came out the way I wanted. xx
ReplyDeleteThat's great Emmy, yes, a friend of mine uses it also for a Chinese dish, hope it's delicious. Thanks for your comment.
ReplyDeleteWhat a fantastic idea. yes, I've had rock candy when I was a kid, but never thought of wearing it as jewelry. Great idea.
ReplyDeleteoooooooooo, came out beautiful! i love the idea of crushing those little guys to make a crystal situation. came out gorgeous!
ReplyDeleteoh i like this!!
ReplyDeletenice inspiration
xo
MOSAMUSE
www.MOSAMUSE.com
Naaaaaaaaaaah you genius!! I can't believe you made a ring with brokend beads!!
ReplyDeleteDon't Call Me Fashion Blogger
Facebook
Bloglovin'
That ring is so striking my dear. You've done an amazing job :)
ReplyDeleteTake care and have a wonderful week,
Daniella xox
You always come up with the best DIYs, Madison! I would never have guessed you made this ring yourself, it looks like something you could buy at any accessories store. Well done! And such a creative use for broken beads, too :)
ReplyDeletexox,
Cee
Madison that ring is so awesome! HaHa I love it! What a sparkly statement piece! Looks great on your hand. Great job and beautiful work doll.
ReplyDeleteThat ring is SO pretty!
ReplyDeleteAnnie
The Other Side of Gray
It came out beautifully!! I have lots of pieces that have been broken, I really should sit down sometime and re-create something from them!! This looks like something from the store, it's awesome. Well done you :)) I hope you have a gorgeous week doll xx
ReplyDeleteI am so in love with this DIY!!!
ReplyDeleteAmazing!!!!
Never had rock candy before, but I do like your version of it with the ring. I need to be more creative! :)
ReplyDeleteThanks so much Cee! This was one of my recent favourites! xx :-)
ReplyDeleteHaha! :-) *blushes* Thanks for your sweet comment. Glad you liked it too!
ReplyDeleteThanks doll. Yeah, I have a few friends who want some, so I may sell a limited number soon. :-) xx
ReplyDeleteThank you Jamillah. x Enjoy the week.:-)
ReplyDeleteWhoa! I love it! So pretty and super creative!!!!
ReplyDeleteGreat DIY!!!
ReplyDeleteXX,
Miranda
What a great idea for a DIY. I love how it came out, so pretty!
ReplyDeletexo, Yi-chia
Always Maylee
Amazing DIY, darling!
ReplyDeleteYou are so creative!
xoxox,
CC
Love this!!!!!
ReplyDeletethat is awesome! i would never think to do this...but great diy
ReplyDeleteWhat an awesome idea for a DIY – the ring is gorgeous.
ReplyDeleteSea and Swank
That's such a creative use for broken (or purposefully smashed) beads and the end result is stunning.
ReplyDeleteThat ring turned out so beautifully! Great idea!
ReplyDeletegreat diy! the end result is pretty amazing.
ReplyDeletexoxo
mochaccinoland.blogspot.com
This is so pretty. You amaze me with your DIYs every time.
ReplyDeletetia-cherie.blogspot.com
I can't tell you how much I love this, Madison. And how much I've loved it since spotting it on Instagram. This is such a brilliant creation! :)
ReplyDeleteAlways love your DIY!
ReplyDeleteOmg, Madison! This looks awesome!!! i was just thinking about what to do with all my glass beads that I don't need anymore, and this is the perfect solution! Thanks for sharing!
ReplyDeleteThanks for your lovely comment on my blog! I would to follow you, I'm going to follow you now on Bloglovin' and GFC! I hope you do the same!
ReplyDeleteFor your post, What a beautiful ring, your so creative! You should seriously sell that on pinterest or your blog! So coool!
xoxo Akinyi
Keep in touch!
http://fitsonme.blogspot.com
Thank you! x Glad that you enjoyed it.
ReplyDeletexxoo :-) Thanks so much lovely.
ReplyDeleteCool idea and very easy to make. Thanks for sharing it :)
ReplyDeletehttp://thegoldenpaillettes.blogspot.com/
What?! This is awesome! lol Sweet looking ring and seems fairly easy. I got a ring in my Julep box that you were supposed to paint the bottom with and put that clear stone over it (sorry... name is popping up right now). I totally could have used that to create this look instead!
ReplyDeleteYou are so creative-- never would I think to turn broken beads into such a pretty ring!!! Great DIY!
ReplyDeleteGreat idea. I love this ring.
ReplyDeleteBest Regards
Miss Margaret Cruzemark
http://margaretcruzemark.blogspot.com/
:) Thank you dear.
ReplyDeleteThanks Alexis! :-)
ReplyDelete